Kim Padan: Pro-Life Speaker

Showing posts with label Stampin' Club. Show all posts

Friday, December 9, 2011

Friday Mashup! Baby, It's Cold Outside!!

(I have that classic tune in my head now. I can hear Ben Folds and Sarah Bareilles of "The Sing Off" right now...very cool!)
Hello and Happy Friday! It's my week to host, and I have a chilly Friday Mashup challenge with some chilly colors for you! Here in the midwest, it is getting colder and darker these days. I leave work at 5 pm, and I swear it feels like it is 10 pm! I have lived in Illinois my entire life...I should be used to it, but that doesn't mean I like it! LOL!! But despite the cold and dark, we can still have fun, and for many in our area that means playing in the snow. I am a wimp, so I don't play in the snow...but I sure enjoy watching people have fun with snow ball fights and making Snowmen! My husband is a big kid, and he loves the snow! So, here is your challenge:
1) Create a project featuring Snowmen
2) Create a project featuring blushing bride, baja breeze and basic gray
3) Or Mash it Up! and create a product featuring Snowmen and the colors blushing bride, baja breeze and basic gray.
For our stamping friends Down Under (waving to Kasey!), I know it is warm for you now. You can play with this chilly theme or make me jealous with the colors in a more summery look!
For my card, I featured the adorable Stampin Up set "Snow Much Fun" which is in this year's IBC. I didn't have any other snowman stamps...not usually my thing...but shucks these guys are ADORABLE! Perfect for those winter birthdays and thinking of you cards! I stamped the image with basic gray ink on whisper white, then used my basic gray, blushing bride, baja breeze and pumpin pie markers to color it in. I used the scallop squares Sizzix die and the Big Shot to cut it out, then sponged the edges with blushing bride. The sentiment is from the same set, punched out with the scallop oval punch and sponged with baja breeze. Both of these layers are popped up with dimensionals. The other fun part is under the snowman. I used my Tasteful Trim die to cut out these waves...liked snow drifts...from the silver glimmer paper (found in the Holiday Mini) and in baja breeze. The baja breeze strip is embossed with the new Snowburst impressions folder. My final 2 details are basic pearls colored with the baja breeze marker and some blushing bride stitched-poly ribbon.
I have a second card, which I made 3 weeks ago with my Stamping Club, just never posted it. I knew I was going to use snowmen for this challenge so I held off. The card base is cherry cobbler, and I added a big strip of glimmer paper adorned with this luscious cherry cobbler quilted ribbon found in the Holiday Mini. I REALLY hope this stuff shows up in future catalogs! I stamped the other adorable snowman and colored him with cherry cobbler, marina mist, basic gray, pumpkin pie and blushing bride markers. The image is mounted on some marina mist dsp from the Subtles Pattern stack. I used my ovals sizzix die for the larger oval, and colored the glimmer paper with my marina mist marker. (Learned that fun trick at a SU Demo meeting!) The sentiment is from On Your Birthday....a must have stamp set!!
So, whether you are in a warm or chilly climate, you get to play in the snow this week! Check out the rest of the Design Team creations for some inspiration on the Friday Mashup blog. Be sure to use keyword FM36 when uploading to your online gallery.
Inky {{{HUGS}}}

Thursday, July 14, 2011

New Goodies!!

I finally placed my first order from the new Stampin' Up! Idea Book and Catalog...and my stash arrived today!! Ribbon, stamps, card stock, impressions folders, dies, chipboard....oooooooooooooooo!!! Too bad I can't call in sick tomorrow! LOL!! I do have my Stampin' Club tomorrow night, so they get to play with me! Plus, dear hubby has to work Saturday, so yes, I'll be playin' all day! Poor guy...he probably feels like his overtime ends up in MY room! Well, we did buy a new very nice camera for him before vacation...so I feel safe! heehee!

Seriously, I know I am blessed to be able to get this stuff. I hope to share some projects with you this weekend! Stay tuned for tomorrow's Friday Mashup challenge and some NEW stuff Saturday and Sunday!!

Inky {{{HUGS}}}

Saturday, May 14, 2011

Summer Mini Club Projects

Hello Friends!

It has been a busy weekend! At work this week, I signed lots of receipts and pledge letters for our fund raiser. Did I ever tell you how it went? It took a couple of weeks for pledges to be entered into the computer...but here we are. The goal was $80,000 for operating expenses...but the pastor giving the appeal challenged us to stretch to $100K to prepare for growth. Well, we reach $123K...WooHoo!! Praise the Lord!

On Friday night, I had my Stampin' Club. We made 2 projects, both using products from the Summer Mini catalog. My first card is a complete CASE of this card from my cyber friend Wendy. It was nice to have someone else do the design work! LOL!! The card base is early espresso, and I added a nice striped pattern from the Nautical Expedition DSP. Another pattern was used for the 1/2 scallop circles on the left. I stamped the compass from The Open Sea stamp set in early espresso on cherry cobbler card stock. The ship is stamped with not quite navy ink on whisper white layered on espresso. I used my ticket corner punch for a simple detail. I added some cherry cobbler bakers twine, then added a sentiment from Teeny Tiny Wishes on the modern label and scallop oval punch.

The second card is bright and feminine. The card base is melon mambo. I stamped versamark on whisper white. I first stamped the sentiment from All Holidays, and coated it with the new wild wasabi embossing powder. After I heated that, I stamped an image from Fifth Avenue Floral, then used the melon mambo embossing powder. I finished the card with a strip of Beyond the Garden dsp and some daffodil delight satin ribbon.

Like what you see? You can get these products by checking out my Stampin' Up! website...just click here!

Now, I have to finish my power point presentation for a conference this week! Yup, I have been busy! But it's all good stuff...busy blessings, I guess you could say!

Inky {{{HUGS}}}

Friday, March 18, 2011

Free 4 All Challenge

Happy Friday, friends!

Just finished stamp club a little while ago...I even cleaned up afterward! Gasp! I worked so hard to get things clean for an event earlier this week (non-stamping related) and I want to keep it that way...at least until April! LOL

Today's Free 4 All Challenge on SCS
was posted by my dear Stampin' Friend Wendybell...SU Demo and NEW member of the exclusive Dirty Dozen design team on splitcoaststampers! We simply needed to make a project inspired by a garden, and the Mini Occasion set "Nature Walk" was a perfect match! In fact, I made this card BEFORE she posted the challenge, by just a few minutes. Yep...totally in sync across the miles!! Ha! Truthfully, we are probably both just anxious for spring to arrive and STAY!

I made this card as a sample for my club so I could highlight this lovely DSP (Botanical Gazette) and the stamp set, since we will not meet next month. Thought the sample might inspire them...and then I decided, let's go ahead and make it! Well,I already had magnets planned, and bookmarks, as requested by the hostess. Good thing, because her face revealed an otherwise hidden truth...she doesn't like the distressed look! Oops! I reassured her that it was no big deal. I still have the kits made up...so we may try this design in a less stressed look on another day! The other projects kept us busy enough tonight.

But hey, I like it...hope you do! The card base is early espresso, and I used this lovely pattern from Botanical Gazette. (I lined the inside of my card with very vanilla and a small strip of the opposite side of this paper.) I crumbled the paper in my hands, opened it up again, and sponged with early espresso ink. Even the marina mist satin ribbon and chantilly lace trim are sponged. I stamped the butterfly in espresso, then used my blender pen to color it in with marina mist and crumb cake, punching it out with the scallop circle, and yes, sponging again! I stamped the sentiment from You're a Gem in cherry cobbler, sponged and used my modern label punch. An antique brad holds it together, popped up with dimensionls.

We still used the Nature Walk stamp set, creating this bookmark. I cut out natural ivory and always artichoke with the 2 Tags die. We used markers to color the flower image. The sentiment is another one from You're a Gem, stamped in marina mist. I lined the ivory layer, just barely with my daffodil delight marker...the club members actually colored the border in more, up to the perforations. Pretty always artichoke seam binding and daffodil delight taffeta ribbon finish it off. Guess my knot is not practical for a bookmark...but it IS pretty,right??

We made another bookmark, but I don't have a picture...yet. I'll update later.

Thanks for stopping by!

Inky (and apparently distressed) {{{HUGS}}}

Wednesday, October 20, 2010

Color Challenge Delay


I made this fun card 2 weeks ago, but took forever to get it uploaded! I thought I'd do it now before completing this week's challenge on splitcoaststampers. Work has been so busy that this week's challenge may show up 2 weeks late too!

The color challenge called for So Saffron, Tangerine Tango, and Rich Razzleberry. I considered using an autumn leaf motif, but somehow ended up with this. Do not ask me how!

The bird is from Elements of Style, and the sentiment is Teeny Tiny Wishes. I stamped the bird in so saffron first, tried rock and roll technique in tangerine, but the tangerine took over! Oh Well! I layered the image panel on razzleberry and added one single glimmer brad, found in the Holiday Mini. Love these things! The brightly colored panel is Presto Pattern Paper, brayered in the 3 colors...neat, huh? I added white ribbon, and placed it all on a tangerine card base. Fun fall birthday card, dontcha think?

Lots to do to get ready for Friday's Stamp Club! Hope to post projects soon!

Inky {{{HUGS}}}

Sunday, September 19, 2010

A Night at the Club


Stamping Club, of course!!

My September hostess loves cards, but wanted some unique techniques or folds. It was great for me...my full-time job has been extra busy prepping for the Walk for Life. I could have easily resorted to the same-ol'-same-ol' stuff.

Instead, we made 2 very different cards. The first is an easel card. I had never made one before, but received one in a demo swap. It is an easy technique with a great "wow" factor. Here is a tutorial. I used crumb cake, baja breeze, very vanilla, not quite navy, and garden green card sock, and elegant soiree dsp. My new bird punch got a good work out...I love how you get the branch, body and wing with one punch! Inside, I added a big designer button from the Candy Cane collection, found in the Holiday Mini, with a bit of hemp twine. The sentiments are from On Your Birthday, stamped in not quite navy. Fun, huh?

Next, we made this warm autumn card. Years ago, my hostess and I were in a club with a different demo, and we made a card with glossy white card stock and a brayer. Well,my hostess wanted to try that again...so here is a card using the serigraph technique. I learned this technique for Virtual Stamp Night early this year. Here is a tutorial. (Note: I did not use white embossing powder...but instead used clear powder over chocolate chip craft ink.) The card base is more mustard, with a layer of cajun craze. On the glossy white card stock, we randomly brayered old olive,more mustard, and cajun craze classic ink. I stamped the large medallion and sentiment from my new Day of Gratitude stamp set, found in the Holiday Mini. I added a large brad from the ice rhinestone set, and a bit of old olive grosgrain ribbon. It is hard to see, but inside we placed a strip of the new Autumn Spice dsp on very vanilla...Yummy!!

Thanks for coming by!! Wanna order some of this stuff? Just click here for shopping 24/7!!

Inky {{{HUGS}}}{

Sunday, August 29, 2010

Now for something totally different...


I love making cards! They can be elegant, sassy, whimsical, simple. I can finish a card quickly or invest a lot of time in it. Card making is a great hobby!

But what about other projects and other (non-paper) materials?? Last week, the club member who was hostess wanted to decorate a jar. Hmmm...what to do? She has a Big Shot, so I decided to use Sizzlits and Decor Element vinyl sheets. I never expected to buy this vinyl, but I am hooked already! What a great way to make gifts for friends and family!

The jar is a simple canning jar from alocal store. I used the Floral Fusion and Little Leaves sizzlits. Vinyl colors are old olive, pumpkin pie, night of navy and so saffron. The flowers have no centers, so I used half-back self adhesive pearls. The top is So Saffron Pattern paper, from the subtles pack, cut with the large scallop circle die. I dampened the card stock to shape it over the lid, and wrapped hemp twine around it. Actually, Bruce did! I just could not get my hand coordinated enough! The wide striped grosgrain ribbon is an alternative to wrap around the lid. That's what I'll do next time!

This project forced me to remember...the Big Shot is not just for paper!! It cuts through a lot of materials! I think I am going to buy some magnetic sheets next for refrigerator magnets...or or cork board for coasters....so many options!!

Inky {{{HUGS}}}

Thursday, July 15, 2010

Another Color Challenge


I LOVE Color Challenges! It's kinda funny...because several of my cyber friends say they "hate" the weekly color challenge on splitcoaststampers. Oh well...we're all different, and that makes our galleries so varied and beautiful!

The Color Challenge from Tuesday called for Wild Wasabi, Marina Mist, and Cherry Cobbler. LOVE this color palette! I made 2 very different cards.

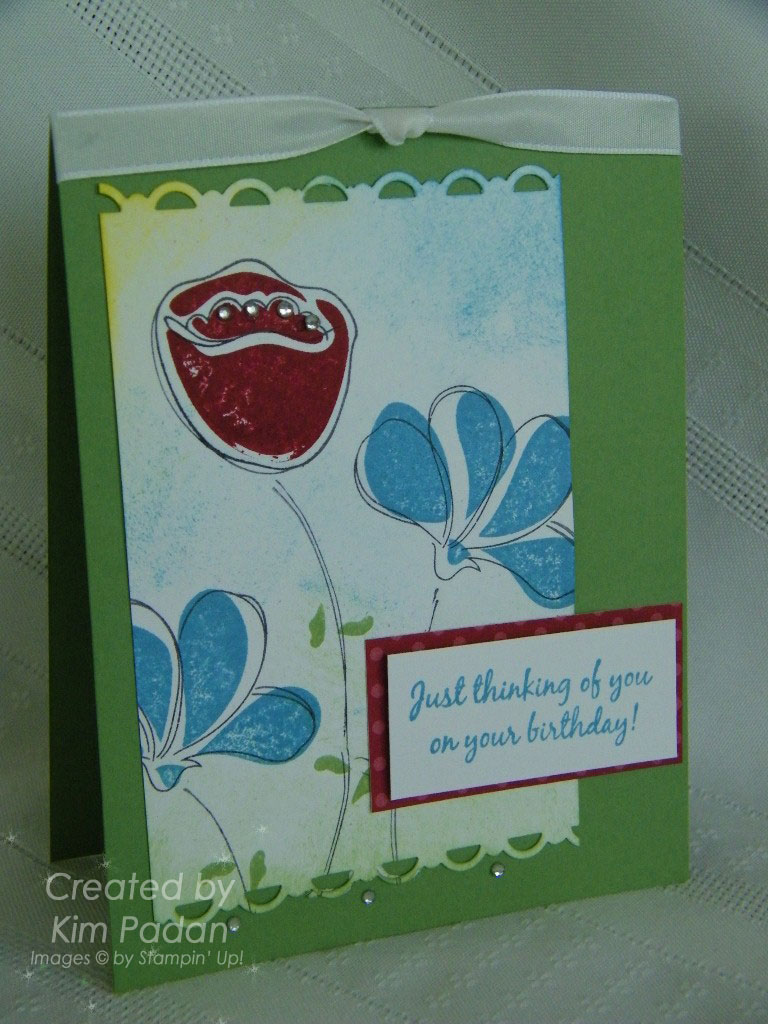
The first card is a simple birthday card using the 2-step stamp set Awash with Flowers and On Your Birthday. I used basic gray to stamp the flower outlines, then added marina mist and cherry cobbler. I sponged with the marina mist and wasabi, and added a bit of daffodil delight for the sun. The main panel is highlighted with the scallop edge punch. Notice the rhinestones? Love having these! The dsp behind the sentiment is from the regals pattern pack...a must-have in my book! Taffeta ribbon literally tops it all off.

The second card was super easy! I had to try my new ornament punch! This month's club hostess chose "Christmas in July" as her theme. I simply punched out the 3 challenge colors, used versamark with Serene Snowflakes, and placed them on basic black. Teeny Tiny Wishes and the Modern Label Punch make a comeback here...you didn't think I lost them did you?? White oranza ribbon adds an elegant finish.

Have fun playing with your new colors!!

Inky {{{HUGS}}}

Saturday, June 19, 2010

It's a Tropical Party!!

Last night, I held my monthly Stampin' Club...and we had a great time in the tropics!! My hostess-with-the-mostest (Waving Aloha to Patti!!) loves parties with themes. So, we decided to focus on great items from the Summer Mini Catalog. I chose to feature Island Oasis DSP in all three projects. Patti even encouraged us to wear bright colors, and brought floral leis and yummy snacks featuring pineapple. We need to do this more often!!

Our first project was a quick Birthday card using the cute set Tropical Party. LOVE this set! I had actually made a different card the night before club, didn't like it...so I made this after work in 5 minutes! These solid image stamps are PERFECT for a very quick card! The only embellishment is a tiny bit of ribbon scraps. We stamped the inside too, because, well...it was easy! Love the colors together...tempting turquoise, rose red, pumpkin pie, old olive.


Next we made a drink umbrella, using the same Island Oasis DSP and my new scallop circle Big Shot die. I will confess that it was tough for me to explain the scoring. We struggled with this a bit, but had a great time laughing about it! No drinking was involved... seriously! An outsider looking in may have questioned that!! For a great tutorial on this little umbrella, check out my cyber-friend and fellow SU Demo, Rhonda.


Our final project was a Pull-out scrapbook. I found the tutorial on splitcoaststampers. Patti is a scrapbooker, so any project that gives her a chance to showoff photos is a plus. This little book takes some time, but it is so well worth it! When finished, you end up with room for 14 small photos! The only stamp used was from Define Your Life. Some chose "journey", others chose "memories." (This set is way more versatile than I realized!) We embellished with grosgrain ribbon, and used several punches, including the corner rounder, the photo corner, 5-petal flower and Extra Large Fancy Flower. A pumpkin pie corduroy brad adds the final touch.


Our Tropical Party was a great way to spend the evening! Let me know if you want to join the fun!!

Inky {{{HUGS}}}

Saturday, May 22, 2010

A Night at the Club

Well...my monthly stamping club!!! We met last night and had a great time as always! We started with graduation cards. I gave them basic black and whisper white...then each card was personalized with school colors. Forgive my stereotyping, but I let them choose between a "His" and "Her" card...but I won't know where these end up!


Both cards feature Happy Grad from the Summer Mini and Itty Bitty Background stamps. I added Extreme Guitar to the guy card and butterflies made with the Beautiful Wings embosslit die. I decided to use black craft ink and clear embossing powder for heat embossing on the sentiment and guitar guy.


The inside uses (sadly) long-retired sentiment stamps and a simple panel with the slit punch for a gift card. In the picture, I just used my business card for keynote speaking! LOL!!


The other card we made is far more elegant, and I am really pleased with how it turned out! We used some of the Presto Patterns Specialty paper, and brayered rose red ink over it to make that gorgeous background layer!! I then stamped Elements of Style in black, and stamped a tiny portion of the image on a circle from my Big Shot Circles die. By coloring that little bit, and popping it up with a dimensional;, we get the "Spotlight" technique. Cool, huh? Added some ribbon, sentiment on an oval...and it is hard to see, but we spritzed the background and image with Vanilla Shimmer Smooch Spritz! Love this sparkle!!

I need 15 of these for a demo swap THIS weekend! Oh My! I will be changing up the sketch just a bit so I don't run out of presto paper. Everyone needs some, right? ;-)

Gotta run...I have more cards to make!

Inky {{{HUGS}}}

Thursday, May 13, 2010

Lotsa Mommas!


So, Mother's Day was last weekend, and I made lots of Mother's Day cards. For my mom, my mother-in-law, several sisters-in-law, and 2 nieces who have kids. Fun!

I used several designs, so I wouldn't get bored. The first was actually a Stampin' Club project in April. It features the Manhattan Flower textured impressions embossing folder. LOVE this! We sponged apricot appeal and pretty in pink ink to highlight the image. The sentiment is from a mini occasion set...hope it makes the new Idea Book and Catalog (IBC)! The card base is almost amethyst (I will miss this color!), with a layer from Tea Party DSP. Celery ribbon and the scallop oval punch added for detail.


I also made a card with one of my new favorite stamp sets...Elements of Style! It is in the Summer Mini-Occassions catalog. This set includes this luscious floral image, a pretty bird, a flourish, and 2 sentiments. (The sentiment here is from Teeny Tiny Wishes.) It's gonna be fun to create all summer long with this! My colors are always artichoke, dusty durango, and crushed curry. Not all Mother's Day cards need to use soft subtles, right? I colored the image with my blender pens...a can't-live-without-it tool. I also sponged the edges...love the aged look!


The last card I will feature here uses a new technique for me: Burnishing. I was inspired to try this technique and this fun new set, Awash with Flowers, by a world-famous Stampin' Up! Demo, "Jan Tink". (Her last name is actually longer, but everyone knows her as Jan Tink!) She had a tutorial on her blog...and it is so easy! I will definitely use this technique at a future monthly stamp club! All it takes is pressing color into the card stock with a sponge dauber, and gradually working the color outward. Wow! I enjoy using rich regals and earth tones together. This card actually features LOTS of colors...all sticking around (or coming back!) for the Color Renovation: Soft Suede, Not Quite Navy, Rich Razzleberry, So Saffron, Always Artichoke, and Baja Breeze! The sentiment is from Teeny Tiny Wishes, punched out with the word window punch. I'm telling you, those items get me to use the smallest of scraps! So cool! Hope you like this too! Be watching for the new IBC that arrives in July...and you too can own Awash with Flowers!!


I had about 5 other designs, but shucks, I don't want to bore you!! My next challenge will be to use all of these flowers in non-mommy cards. Hmmm...did I say that outloud? Guess I will have to really do it!


Inky {{{HUGS}}}

Thursday, January 14, 2010

Valentine Girls' Night Out

So...I am mostly a "hobby demo" for Stampin' Up. Like thousands of stampers, I LOVE the quality of products, and so I buy a lot...maybe more than I need...Nah! Well, after my hubby got a better paying job in the summer of '08, I signed on as a demonstrator so I can get a 20% discount on everything I order! I say to him "Honey, I spent your overtime today." LOL! Bless his heart, he supports my habit, I mean hobby. After all, I make cards for the family, cards for the ministry...truly it is something I love.

I do have some stampin' friends from years ago who wanted me to start a monthly club. We met once a month for 10 months in my home. I showed them new techniques, and they purchased supplies like stamps and card stock. We also take time to eat, 'cuz, well, why not?? I love having customers and sharing this hobby with them.

Here it is 2010, and my club will be starting in February...I can't wait! But before that, I actually will host a Stampin' Workshop for a friend and her co-workers on February 1st!! I am so excited, because I get to introduce people to this great craft! Let's face it...with electronic communication like email, Twitter, Facebook and blogs (like this one!), the personal hand written note is nearly extinct! I love making someone a card, then writing a note...sloppy penmanship and all. Now I get to encourage others to do the same!!


So. let me show you what we're gonna make...


This first card uses Stampin' Up's In-Colors: Rich Razzleberry, Crushed Curry, and Melon Mambo, including the designer series paper Razzleberry Lemonade. It features the Mini Occasions stamp set I {heart} Hearts, plus Teeny Tiny wishes. This will be a fun card to make with new stampers!


I admit, it is a toss-up for the second card. Here are 2 samples...I am letting the hostess pick...

The first was for a splitcoaststampers "Clean and Simple" challenge. I wanted something for a man. I used black craft ink, versamark and red classic ink, and clear embossing powder. The images are from Baroque Motifs...a must-have set in my book! I stamped on sahara sand card stock, and added the new black satin ribbon at the fold.


This next card has just basic black and very vanilla card stock. I stamped the flower from "Three Little Wishes" in Stazon Black, but decided not to color it in. The sentiment is stamped in real red. Add dry embossing with my Big Shot Texturz Plates, oval punch, scallop oval punch, ticket corner punch and satin ribbon, and you have a simple, but classic looking Valentine. This stamp set is in the regular Idea Book & Catalog (IBC), but from Jan-March, it is available for free as a Sale-a-Bration item with a $50 order! How cool is that??


Finally,I wanted to make a non-card item. Well, using my Big Shot, along with the Bigz XL Fancy Favor die, and I have this CUTE bag! I added the strap, using my new scallop trim border punch (another FREE Sale-a-bration item, with a $50 order.) The paper is Sending Love designer series paper...LOVE the patterns! I added a cute sentiment from All Holidays, stamped in chocolate chip. It's hard to se, but the strap is attached by ADORABLE pretty in pink corduroy button brads! I have these corduroy embellishments in about 6 colors! Circle and scallop circle punches come in handy for cute little projects like this too!!
So...if any of this stuff looks like fun (of course it does!) but you are not gonna be at the Girls' Night Out, you can contact me, or even order online by clicking HERE
Happy Stamping!!