Kim Padan: Pro-Life Speaker

Showing posts with label Hostess Sets. Show all posts

Saturday, January 19, 2013

...and for Staci...

Hello Again!

As promised, here is the other card I made for one of my staff members.  Three new people joined the team last October, so each received a 90-day evaluation and a hand-crafted card this week!  This card features the Freshly Made Sketch challenge found here.


Staci is my new Client Services Manager.  As this card states, she is "fantastic!"  She is smart, creative, and takes initiative.  I am so blessed to have her on staff.


The card base is pool party.  I already had a piece stamped with Serene Snowflakes, using pool party, island indigo, blushing bride, and wisteria wonder.  I cut it in half for the sketch, and paired it with the wisteria wonder, embossed with a cuttlebug embossing folder.  I added blushing bride pleated ribbon.  My sentiments are from a SU hostess set, Perfect Words, stamped in island indigo, punched out with the modern label punch and lightly sponged.  The center has a felt snowflake, finished with a polka dot brad.  This is definitely a puffy card...great for hand delivery...even at a job evaluation!

Thanks for coming by!

Inky {{{HUGS}}}
Kim

Friday, January 18, 2013

Cards for My Staff

Hello Stamping Friends!!

Last October, I had three new people join the ministry staff.  That means that this week, I had three 90-day evaluations to complete. Each of these women are doing great work, so I enjoyed making cards for them.  I will post 2 cards today, both using daily challenges on splitcoaststampers.  The third one used a blog challenge, so it will have its own post.  :-)


The first card was for last Sunday's Featured Stamper challenge.  It had been ages since I participated in this challenge, but when I saw that Lynn (aka allee) was being honored, I had to join in.  She frequently makes comments on my cards...so I wanted to share the love!  You can see my inspiration card by clicking here.  I made the card for Julie, our new Director of Operations.  It is a new position for our ministry...and having her in-house allows me to spend more time connecting with the community and individual supporters.  My card base is peach pizzazz, with a layer of very vanilla.  I used various acrylic blocks to stamp with peach pizzazz, pumpkin pie, daffodil delight, melon mambo, and primrose petals.  My sentiment is from Stampabilities, stamped with pumpkin pie craft ink, then heat embossed.  The image is from "Of the Earth," a retired SU hostess set, also heat embossed.  I punched it out with a scallop circle,then sponged with peach pizzazz.  It sits over pumpkin pie taffeta ribbon.


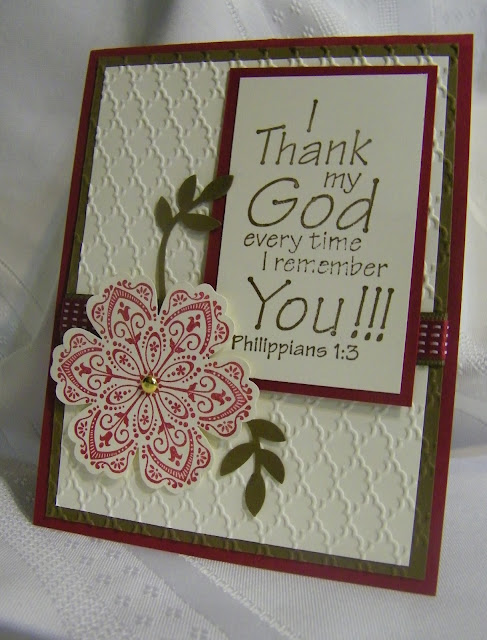
The next card uses a recent SCS color challenge:  very vanilla, soft suede, and raspberry ripple.  I made this card for Kelley, who had been a volunteer, but was hired after a longtime staff member moved  away.  Kelley has been a blessing!  My card base is raspberry ripple.  The layers of soft suede and very vanilla were embossed in the Big Shot with the fancy fan folder.  I added both suede and raspberry ribbons.  The sentiment is from Stampabilities.  The flower is from SU's Mixed Bunch, punched out with the coordinating punch, and finished off with a gold brad.  I used my bird punch to get the soft suede leaves.

Thanks for stopping by!  It feels good to be stamping and  blogging on a regular basis again!

Inky {{{HUGS}}}
Kim


Friday, March 16, 2012

Friday Mashup #50!! Blog Candy!!

Hello, and Happy Friday!! It's a great day, because we celebrating Challenge #50 at the Friday Mashup!! And a celebration isn't complete without some treats! So this week, we have Blog Candy on each Design Team members' blogs! More on that at the end of my post.
But first, Heidi is hosting this week's challenge, and it's a beauty!! We have a great sketch and a fun technique!
  1. Make a project using the "Sketch"
  2. Or Make a project using the "Faux Mother of Pearl Technique"
  3. Or Mash it Up! and Make a project using the "Sketch" and "Faux Mother of Pearl Technique"

    This is such a lovely technique that I had NEVER used before! (This DT gig has really expanded my horizons! LOL) If it is new to you, check out this tutorial on Splitcoaststampers.
My card is filled with fresh colors for spring! All products used are from Stampin' Up! After flipping the sketch, I started with a wonder wisteria card base, layered with lucky limeade and 2 sides of the same sheet of Cheerful Treat dsp (a hostess item in the Idea Book & Catalog.) I added some retired polka dot melon mambo ribbon, but you can get new ribbon with scallops! Next, I used shimmer paint on whisper white, and sponged with pink pirouette ink for the mother of pearl technique. I stamped this image from Bordering on Romance (from the Occasions Mini) with stazon black ink. Next I used my blender pens and re-inkers to color the image. After it dried, I punched it out with the extra large scallop circle punch, layered it with concord crush and popped it up with dimensionals. (Edited: The concord crush circle was made with the Sizzix Circle di found in the Stampin' Up catty) The sentiment is from Teeny Tiny Wishes, stamped with concord crush ink on more of the sponged/mother of pearl paper.

Now...about the BLOG CANDY!! For my collection, I have 2 rolls of non-SU ribbon, an unused non-SU stamp set (cute, but I just never touched it!), a scallop circle chipboard "scrapbook", and lots of rub-ons, including Christmas and Valentine's Day sets. So, how do you win? First, submit your submission to the Friday Mashup Challenge #50. (Deadline is Thursday 3/22 at 12:00 a.m. EST) Next, go to each Design Team member blog, and comment on each of their entries. Every DT member has blog candy, so there are lots of chances to win!! (Just one blog candy bundle per person, shipping just to USA and Canada). We are excited to see what creative projects you create!!

Inky {{{HUGS}}}

Friday, October 21, 2011

Friday Mashup! That's a Wrap!!

Hello Stampin' Friends! It's time for another Friday Mashup...and I am your challenge hostess this week! I hope you have fun with it! I like to stretch myself by creating cards with different features or folds. One feature is the "belly band" which wraps around your project. I also like using twine as an alternative to my ribbon addiction. Both of these give us our challenge: That's a Wrap! (Blogger is giving me fits...hang in there with me!)
1. Create a project with a Belly Band
2. Create a project using twine
3. Or Mash it Up and Create a project with a belly band and twine!

For my project, I made a "squash card" which was a technique lover's challenge on splitcaststampers a few years back. This thread includes a tutorial. http://www.splitcoaststampers.com/forums/try-new-technique-f44/tlc201-fun-funky-fold-t406759-3.html#post12499784
I used "Pocket Full of Posies" dsp, cut down to 10x10, and folded to make a 5x5 card. This pattern is so fun, I didn't have to embellish much. The belly band is a one inch strip of the flip side. I added bakers twine in early espresso. Using my decorative label and 2 oval punches, I added a sentiment from Teeny Tiny Wishes. The card stock is daffodil delight, pear pizazz and whisper white.
On the inside, I added layers of pear pizzazz and whisper white. I colored the large image from "Hello Friend" with my pear and razzleberry markers. The sentiment from the lower panel is retired. The top panel uses On Your Birthday and a smaller stamp from Hello Friend which I repeated along the top border. Both squares are also sponged. I did not add brads or other bumpy items inside so the card would close well, and the belly band would still fit.
You don't have to make a squash card. In fact, the design team has a great variety of inspiration projects to get you started! Have fun with jt! Check out the Friday Mashup blog, http://www.fridaymashup.com/2011/10/fm29-thats-wrap.html and upload your Wrapped projects by next Wednesday! I'll be looking for the Rock Star!!
Inky {{{HUGS}}}

Sunday, October 9, 2011

Happy Anniversary, Dear Hubby!!


Hello Friends! Today is my 18th wedding anniversary! Of course, I had to make Bruce a card, and I pondered it for days. I actually intended on participating in last week's Paper Player Challenge, which had a musical theme. But I made this a day too late...oh well! I did decide to change my card a bit to correspond with the Hope You Can Cling To challenge from a few days ago, Real Men Wear Pink. We were challnged to make a masculine card with a touch of pink. Bruce is NOT into pink, but he is a real man who supports me at home, in my ministry, and just in our every day lives!

All of the supplies are from Stampin' Up! My card base is early espresso, with a strip of soft suede embossed with the square lattice folder. I sponged river rock and soft suede on very vanilla, then stamped the Extreme Guitar (retired) in early espresso craft ink, which I then heat embossed. I punched out a heart in melon mambo for the pink, then decided to add a tiny bit of melon in my background. The sentiment on the bottom is from Teeny Tiny Wishes, stamped in melon then punched out with the word window. The other is from Perfect Words, a hostess set. I used my early espresso and melon mambo markers to color it, and then punched out with my oval. My final detail is the early espresso baker's twine...love this stuff!!


Gotta run...we're gonna see a movie and get dinner. Hope you have a great day!

Inky {{{HUGS}}}

Sunday, October 2, 2011

Sunday Challenges!

Happy Sunday! I made 2 cards today. I wanted to make more, but arthritis meds made me groggy. Oh well. I am thrilled that I got these 2 done!


The first card is for the Featured Stamper challenge, and ths week we get to CASE Dianne (aka Eured99). Dianne stops by my gallery a lot, and makes such encouraging comments. I was thrilled to use her work as inspiration!! I chose this card to CASE. I kept the sketch and used all Stampin' Up products as she did. Instead of dry embossing, I sponged the image panel. It looks weird, but hey, I got it done! LOL! I used melon mambo for the card base, and added razzleberry lemonade dsp (retired.) The crushed curry ribbon and ink are also retired. The image is from Aviary, and the sentiments are both from Hostess sets...Precious Butterflies and Perfect Words. The image and oval punched sentiment are both popped up with dimensionals.


My next card is for today's Hope You Can Cling To challenge, as well as this week's sketch challenge on splitcoaststampers. My card base is pink pirouette, and I added a layer of very vanilla which was embossed with perfect polka dots. I pulled out retired Sending Love dsp, adding some sparkle. I made some of my own dsp with butterflies from Precious Butterflies in rose red, pink pirouette, pretty in pink, and pear pizzazz. The large scallop circle is retired pear pizzazz pattern paper. I stamped more butterflies in pink pirouette and a sentiment from Perfect Words in pear pizzazz. I used the butterfly punch to finish out the sketch. The pearls and glimmer brads add the final details.

Tomorrow I'll be back at work...no stamping...boohoo! Well,maybe some late at night! So many new challenges, so little time! *wink*


Inky {{{HUGS}}}

Friday, September 9, 2011

Friday Mashup! I'm Itching to be Stitching!

Happy Friday everyone!! Time for another fun challenge with the Friday Mashup! Heidi gave us a challenge thatt truly stretched me (that's why it's called a challenge!) Here's the challenge:


  • Make a school themed project

  • Make a project with stitching (real or "faux")


  • Or Mash it Up and Make a school themed project using stitching!
Wow! I have no school themed stamps...but I did have this cute apple from the retired set Tart & Tangy. I don't sew, with a machine nor by hand. Thank goodness fake stitching was permitted! LOL! All of my materials are from Stampin' Up! Here's what I used: Real red for the card base. I added a layer of daffodil delight, with 2 strips of real red 1/4" grosgrain ribbon, then a simple square of basic black for the chalkboard. I colored my apple with markers in real red, blush blossom, chocolate chip and lucky limeade, stamping it on whisper white. I punched it out with my 1-3/8" circle punched and layered it over night of navy punched with the scallop circle. I wrote the chalkboard sentiment with my white gel pen. The smaller sentiment is from a new hostess set, Perfect Words, stamped in night of navy, layered on oval punches and the modern label punch. My final detail is the faux stitching...made with my night of navy stampin' write marker.


I hope you join us for the Friday Mashup! Check out what the Design Team has for inspiration, and post your own creations! Be sure to use keyword FM23 in your online gallery. You can also vote for the next Fan Favorite challenge! You will find the poll on the Mashup blog, right column.


Well, no school stamps, last week no number stamps... a few weeks ago no cupcake stamps. Good grief! Looks like I need to buy some stamps!! (My husband might disagree!)


Inky {{{HUGS}}}

Tuesday, August 23, 2011

Colors and a Paper Players Sketch

Hello Stampin' Friends


Today's card is for the color challenge on SCS, as well as this week's Paper Players Challenge found here. The colors are bold, the sketch is Clean and Simple...made for a quick, fun card!

I started with a night of navy card base. I added whisper white and real red, which was embossed with the square lattice folder in the big shot. I used the 5-petal flower punch, with daffodil delight and real red card stock, and embossed them with the perfect polka dots. I added glimmer brads from the brighg and subtles collections (so saffron since there isn't a daffodil delight glimmer brad). The sentiment is from a new Hostess Set called "Perfect Words," bstamped in night of navy ink. I also added a few touches with my white gel pen. I finished it off with white, red, and daffodil grosgrain ribbon.


This will make a great thank you card...or a thinking of you...or any note to a good friend!


Inky {{{HUGS}}}

Wednesday, June 15, 2011

Dare to Add Shimmer!

Happy Wednesday! Time for another Color Dare!
Today we are using Blushing Bride, Elegant Eggplant, Pear Pizazz, and Sahara Sand...love it!!
I had some different ideas, but frankly have no idea how I ended up with this card! LOL! I wanted something quick and simple. Well, this was fairly simple, but definitely not quick!
My sahara sand is the card base; barely noticeable. I added a layer of blushig bride pattern paper from the Hostess stack. That was the quick part! Next, I embossed my elegant eggplant with the elegant bouquet folder. I wanted the flowers to show up more. So, I pulled out my frost white shimmer paint, and added color with my ink refills! Fun! I colored over the flowers with my blender pen because it was in reach! LOL! I did clean it up right away! It took a long time to dry...next time, I'll let it sit longer. The stamped image is from my neglected Oval All set, stamped in eggplant and colored with markers. I punched it out with the scallop oval punch, and placed it over my pear pizazz twill ribbon.
This is a terrific color challenge, so I really hope you play along! Check it out at http://colordare.blogspot.com and use keyword CD105 in your online gallery.
Inky {{{HUGS}}}

Wednesday, June 1, 2011

Dare to Add Layers!

Happy Wednesday everyone! Time for another Color Dare challenge! This week's challenge is fun...it matches the logo where I work! We are working with Tempting Turquoise, Pear Pizazz, Chocolate Chip and Very Vanilla. Yum!! (Once again, I am having trouble inserting links. ugh. Go to http://colordare.blogspot.com )
I started with a chocolate chip base. My card is 5x5...I know, I know. Extra postage for a square card. But some people are worth it! I layered very vanilla, which I embossed with my perfect polka dots impression folder. I had these scraps of pear pizazz pattern paper from the Hostess level 1 stack, and decided to layer with turquoise (also embosssed.) I had some retired ribbon in my bin, and the polka dots are perfect with this! My image and sentiment are both from the Hostess Level 1 set Silhouette Sentiments. I used my markers to color the image, then punched it out with my extra large scallop circle punch. I then sponged with the turquoise and pear to mimic a sunny sky and a tree full of leaves. That layer was placed on a chocolate chip circle, cut out with my sizzix circles die. The circle is popped up with dimensionals...well, 'cuz I just had to use dimensionals! Finally, I added some very small pearls which I colored with my pear marker.
Now, I cannot wait to see what you come up with! Check out the Color Dare and play along!!
Inky {{{HUGS}}}

Sunday, May 29, 2011

Stampin' Sunday!!

(Note: Blogger is giving me fits! I was unable to link all of the challenges today...I'll try again tomorrow.)
Hello Stampin' Friends!
Sunday is a day of rest...and for me, that means playing with my inks and stamps! No laundry, no dishes, just play!! I decided to catch up on a few challenges from SCS. This post could get long!
First, I made this card yesterday for the Inspiration Challenge found here. The inspiration site had party supplies, and I was captivated by this colorful napkin. I used naturals ivory for my card base. My scallop trim punch got a workout with some scraps in melon mambo, rich razzleberry, cajun craze, tempting turquoise, and old olive. Some of the scraps were already embossed. The medallion image is from the Artisitic Etchings stamp set, colored with markers. The sentiment is from On Your Birthday, and that other detailed stamp is also from Artistic Etchings. I added 2 bands of scrunched satin ribbon. Overall, a very different look!
My next card combines this week's Color Challenge (baja breeze, soft suede, and perfect plum) with today's Featured Stamper Challenge. I chose this card to CASE. The card base is textured soft suede, and I added 1/2 a top note die piece of elegant soiree dsp. I brought out my recently retired Sale-a-Bration set "Bliss" for these wonderful butterflies, popped up with dimensionals. The sentiment is from Because I Care, a Hostess Level 1 set, stamped on vanilla and cut like a banner. Baja seam binding and plum flower brads finish it off.
Catching up with my beloved color challenges...here is one with regal rose, rich razzleberry and very vanilla. I had not used regal rose in months, and now I have used it twice within 10 days! I was truly at a loss...but I opted for this simple and quick sponged look. I ran my vanilla card stock through the big shot with the elegant lines impression folder, then sponged the two bright colors right over the surface. I added lots of rhinestones to make it very girlie! The sentiment is from Just Believe, and it is layered on the modern label and scallop oval punches.
The next color challenge (actually, going backwards!) features so saffron, certainly celery, and blushing bride. A young woman from our church is getting married this summer; her bridal shower is in 2 weeks. Her colors are muted pinks and greens, so I decided this combo would work. I got this Blissful Bride stamp set in that online auction back in March. Perfect! I stamped it with basic black ink, then used my markers to color the sash and flowers. The sentiment is from Teeny Tiny Wishes, punched out again. Finally, I added some retired saffron ribon and basic pearls.
My last card is not a color challenge! It's Friday's Free 4 All, hosted by my friend Dawn. We could post anything, any theme, color...just had to include something we got for free. I got these bright brads and ribbon from my friend Kathy last summer. I brought out retired card stock in yo-yo yellow, pink passion, and only orange. I wish I had stamped 4 flowers...kinda planned just one brad to off-set, but then the squares are so small, so I added the center punched flower. Oh well...it's bright and fun!
Now I have to clean up my mess so I can stamp more tomorrow!!
Inky {{{HUGS}}}

Friday, May 20, 2011

Friday Mashup! Ribbons and Pearls, and all things Girls!


Hello, and Happy Friday! It's time for another Friday Mashup challenge! Today, we are taking a complete 180 degree turn from last week. That monochromatic masculine challenge was tough...today we get to use girlie stuff!! Ribbons! Pearls! Anything for girls!

I decided to pull out a retired, but all-time favorite stamp from Summer by the Sea. This little girl is precious, and fun to color. I stamped the image in stazon black on SU watercolor paper. I then used my aqua painter to watercolor, grabbing colors from my ink pads. The colors used are blushing bride, perfect plum, blush blossom, so saffron, baja breeze,and pear pizazz. (The blush blossom ink pad is retired, but you can get that color in a marker.) I mounted the image on some baja breeze card stock, then layered on some blushing bride dsp from the Level 1 hostess pack, all on a blushing bride card base. Using my baja breeze marker, I colored some basic jewel pearls. Make sure you let them dry a long time. I actually have a sheet of pearls in various colors for future use! I added some certainly celery satin ribbon; my usual knot got in the way of my pearls, so I changed it up to a faux bow. Teeny Tiny Wishes and my punches finishes this off.

Now...I wanna see what YOU create! Make sure you use the keyword MU07 in your blog or online gallery.

Inky {{{HUGS}}}

Wednesday, April 6, 2011

Happy Birthday, Claire!


Hello Friends!

Today is my dear friend Claire's birthday. I met Claire at church shortly after moving here. We connected right away. She is around the same age as my mom, and since my mom lives so far away, it was nice to have a mom-like friend close by. I sang at weddings for 2 of her 4 kids...and one of them sang at mine! Claire and her husband Bill volunteer at the ministry behind the scenes. They stuff envelopes, take out the garbage, weed the flower beds, participate in the Walk for Life. They are such humble servants who love Christ and His precious children so much!! I love them dearly!!

Claire loves pinwheels, and so I made this card for her. Boy, did I struggle with it! The colors were not my idea, but a Color Challenge (of course!) on SCS...baja breeze, poppy parade, and pear pizazz. I cut 2 inch squares of patterned paper in each color (the poppy and pear are from the Hostess Level 1 pack), cut them in half diagonally, then rounded the corner. Placing them on the whisper white background was far more tricky then it should have been! I placed a big designer button from the Mini Occasion catalog Springtime Vintage collection in the center. It has just a bit of linen thread on it as well.

The pinwheel takes so much room, that I really struggled with the sentiment. So, I just cut a tag, added some baja breeze and pear pizazz seam binding, and stuck it in on an angle. The sentiment is from On Your Birthday.

Kinda different...hope she likes it!! Maybe YOU have a good friend who needs a card today!

Inky {{{HUGS}}}

Monday, April 4, 2011

Cake Inspiration


Two posts in one day! I guess I am anticipating a rough week later on!

Last Thursday, the Create with Connie and Mary blog challenge had us look at a pretty funky cake. I focused primarily on the color scheme, but there were some stripes and some curvy swirls also.


I decided my striped river rock pattern paper would work, and I used my extra large decorative label punch 3 times to get some swirls. I stamped the Hostess Level set, Silhouette Sentiments, on whisper white, using my marina mist and river rock markers. I cut the other labels, then attached the pieces along the edge of the white label to get this effect. Satin ribbon always adds a nice touch, and a bit of retired gold cord matches the trim on the cake. My sentiment is punched out with a circle, and the main whisper white panel went through the big shot with the perfect polka dot impressions folder.

Funky cake...fun card!!

Inky {{{HUGS}}}

Tuesday, March 22, 2011

Right Rose or Wrong Rose??

I sound a bit like Scooby Doo...Ruh-row!

Today's Color Challenge on SCS was posted late last night. So I gathered some materials (all from Stampin' Up!), stamped an image...but then headed to bed since it was nearly midnight. I thought the colors were so saffron, pear pizazz, and rose red. I even colored some basic pearls with my markers, and cut a strip of retired rose red grosgrain ribbon. I finished the card after work (including a lovely dinner out with some ministry friends!), then looked up the thread to post my card.


Ruh-row! I need REGAL rose, not rose red! Thankfully the color police did not show up at my house! LOL! I took the other half of my so saffron sheet for another card base, and made a quick card...again. The "dessert option" was to include items that begin with the letter "P". I used my perfect polka dot impressions folder with the big shot. I also used my extra large scallop circle punch with the polka dotted pattern paper. Both cards have pearls, and this cute little pig from a retired set called Very Punny. The dsp in the 2nd card is retired...but it has a nice plaid pattern to it! The pear pizazz pattern paper in card #1 is from my beloved hostess level 1 stack! The pig images are stamped with stazon black ink and colored with marker, including a bit of pear pizazz grass. The pear pizazz ribbon is thick and heavy, so I secured it with some sticky strip around the back.

Then it hit me again...gee, those polka dot circles look similar. Oh No! I used melon mambo on the 2nd card. Good grief! Well, the pig is colored with a regal rose marker...I promise!

Both cards were easy to make...clean and simple design.

I guess a rose is a rose is a rose...in all sorts of shades!!

Inky {{{HUGS}}}

Wednesday, March 16, 2011

Ice Cream Parlor Magnets!

I mentioned on Sunday that we played with the magnet sheets and my Big Shot last weekend. Oh. My. Goodness! What fun!! I wasn't sure if my little hands could get the material through the Big Shot, but it was a breeze! (Note...the watermark uses my name, but these are original designs by these girls!)

I used the scallop square Sizzix die, which makes 2 different sizes. We also ran some DSP from the Sale-a-Bration "Ice Cream Parlor" collection. Some of the die cuts were also used, along with buttons and ribbon from a separate SAB item.

Now, in the first magnet, Jenna used Ice Cream Parlor DSP, but used the Mini Occasion Catalog Set, Eat Chocolate. She colored the image with Stampin' Write Markers, and punched it out with the large decorative label punch. A big button from the Sew Sweet collection finishes it off.


Her smaller magnet uses the other side of that Ice Cream Parlor dsp, and the image is from Morning Cup, which you can find in the regular Idea Book & Catalog (IBC). Markers came in handy again, as did a little dimensional!


Lauren also made 2 cute magnets. She used the Ice Cream Parlor dsp and die cuts for the large magnet, and stamps from Cute by the Inch (Hostess Level 2 set) and Hello Again (available as a free Sale-a-Bration set). I love how she colored with markers, and added one tiny button from the Ice Cream Parlor collection.

Now check out her next one...those dots behind the cupcake (Also from Cute by the Inch) are hand colored!! I am serious! She took the markers and painstakingly colored the polka dotted background! I don't know about you, but I am impressed!! Love the ribbon detail too!


Finally, my own magnets. The picture was taken a different day in a different space. Oh well! I also used the Ice Cream Parlor dsp, and buttons, and ribbon! My large magnet uses a retired stamp (from Best Yet) and my small magnet uses a stamp from You're a Gem, found in the Occasions Mini.


Tomorrow night is my bi-monthly club. We'll also make magnets, but some other projects as well. I'll be posting those this weekend!

Thanks for stopping by!!

Inky {{{HUGS}}}

Wednesday, February 23, 2011

Better Late than Never!

I made these two cards this past weekend...one for a color challenge,one for a sketch challenge. I am so glad that the challenges on splitcoaststampers are open forever! It is rare that I complete them on the day they get posted! But, I figure it is better to participate late than never...because, as a stamper, I learn so much from these challenges!

The first card was for last week's Color Challenge on SCS...so saffron, wild wasabi, and pacific point. LOVE these fresh colors! I decided to make a spring card...I am SO ready for spring! The striped ribbon is retired; I ordered it last year from the Clearance Rack. Keep an eye on that page...who knows what goodies you can get! My pacific point pattern paper is retired also, but you can get the new patterns in the Brights Pattern Paper Stack. The flower image is from the Hostess Level 1 set, Silhouette Sentiments. I colored it with markers. I used my scallop trim, corner rounder, word window, and modern label punches, along with Teeny Tiny Wishes to finish it off.


The second card is for a recent sketch challenge on SCS...a great one for highlighting lovely DSP. I had this retired Bella Rose paper out for Valentines, and decided to use it some more. The card base is retired kiwi kiss. I added a band of pink pirouette, which was embossed with the square lattice impressions folder and the Big Shot. The kiwi corduroy buttons were purchased from the Clearance Rack. That cute bird is also from Silhouette Sentiments, which is my favorite Level 1 set this year! I colored it with old olive and riding hood red markers. Teeny Tiny Wishes quickly turned this into a birthday card.

Hope you have fun with some creative challenges today!

Inky {{{HUGS}}}

Saturday, February 12, 2011

Dare to be Inspired!

Hey there! It felt good to get back into my stampin' room today after a very long work week! I peeked at today's Inspiration Challenge on SCS, and the top post on the Santa Barbara Chic blog had this picture of a noodle dish. I guess I was hungry, because I barely looked at the rest of the blog!! I also liked the picture, because it was perfect for this week's Color dare...bashful blue, peach parfait, and garden green. Everything used in this card is from Stampin' Up!

I used my Elegant Lines impressions folder to mimic the bowl of noodles. I used my Big Shot and Sizzix large scallop circle and ovals dies. The image is from Friends Never Fade, and I used Teeny Tiny Wishes again. I punched out some of the peach parfait pattern paper from the Hostess Level 1 pack, then layered it with the modern label and word window punches. Regal brads, candy cane designer button (retired), basic jewel pearls and twill ribbon add the finishing touches.

Hope you like it!

Inky {{{HUGS}}}

Wednesday, January 19, 2011

Color and Throwdown a Sketch!


Happy Wednesday! I went to a different color challenge blog today...the Color Throwdown, this week featuring pear pizazz, kraft (crumb cake) and blushing bride. I have peeked at it frequently, but this is the first time I participated. I combined it with the Sketch Challenge on splitcoaststampers. I pulled out my new SU set, "Bliss" which is available through Sale-a-Bration. Just order $50 in Stampin' Up product from January 25 - March 31, and you can choose this set, or one of many other sets or special SAB accessories.

The base is crumb cake, and I used pear and blushing bride pattern paper from the Hostess pack. I love the cotton twill ribbon, just had to choose which color to use! I stamped two of the images from Bliss on very vanilla card stock, and another one in crumb cake to leave a watermark on one side. My usual sentiment set up fit perfectly with this sketch. Finally, I added some pearls for a final feminine touch.

Hope you like it...I do!

Inky {{{HUGS}}}

Sunday, January 16, 2011

Featured Birdie!


Today is Sunday...and that means Featured Stamper challenge on SCS. Today highlights the talent of Tracy (aka whoistracy). WOW! What a beautiful, clean look she has!! I am stocking up on thank you cards, and decided to make one for today with my Aviary set. This is the card I chose to CASE. (Edit: I now have a link to the card, not her entire gallery) I pulled out a soft color palette...blushing bride, pear pizazz, and baja breeze, including patterned paper from the Hostess Level 1 pack. The satin ribbon is retired ('cuz I am trying to finish it off!) but Fear Not!! You can now get baja breeze seam binding, which has a lovely sheen to it...it's available in the Occasions Mini. I bought 3 rolls already! LOL!! I stamped the bird cage in basic gray, which I like over basicblack when I have a softer pallette. And the little bird mimics the little bird on Tracy's rainbow! How cool is that? ;-) One more thing...did you notice Teeny Tiny Wishes without punches?!? Gasp! Sometimes,less is more!

Hope you get to stamp today!

Inky {{{HUGS}}}